Reach-in closets are the most common closet type in American homes, yet they’re the hardest to organize. The 24-inch depth and single rod force tough choices — mix shirts with pants? Stack shoes on the shelf? Leave the floor a dumping ground?
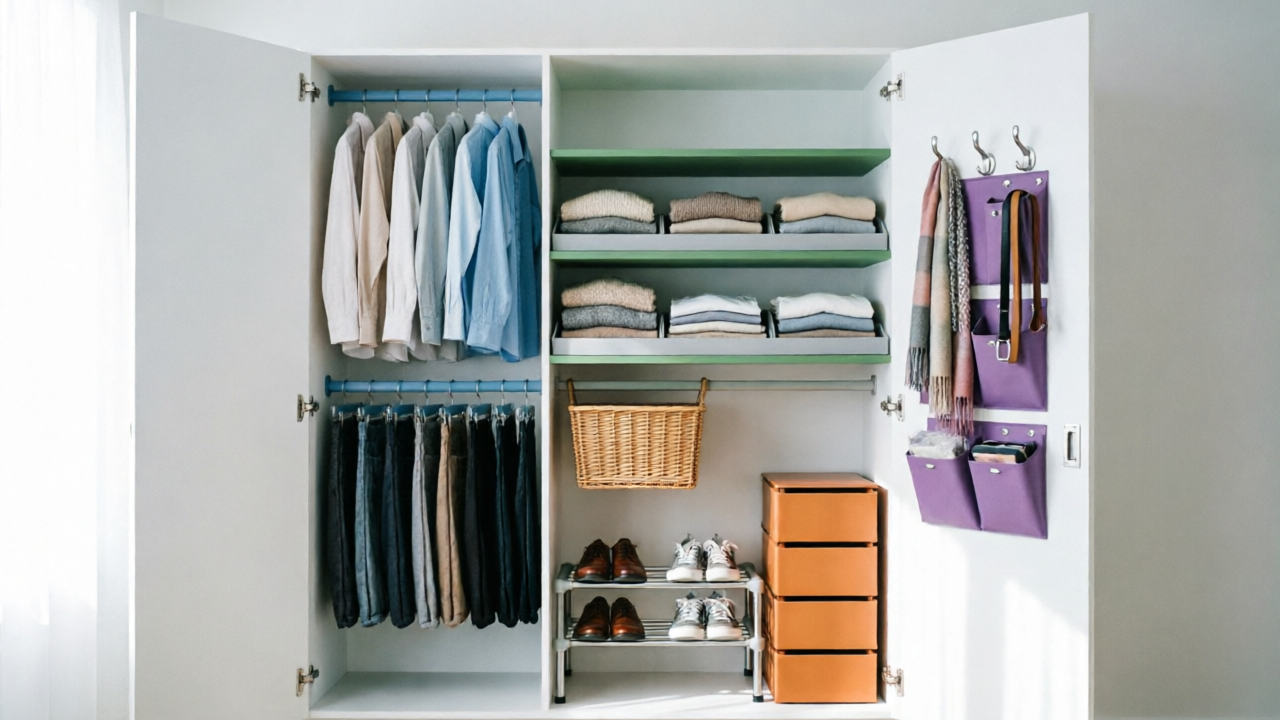
An organized reach-in closet follows a 4-zone system that uses every inch: the hanging rod, the fixed shelf, the floor, and the back of the door. In this guide, I’ll walk through the 5-step method that converts any standard reach-in into a space that holds everything you own without the avalanche effect.
Essentials — The Reach-In Closet Problem
What Is a Reach-In Closet?
A reach-in closet is a wall cavity with a single door. The standard dimensions are 24 inches deep by 24 to 72 inches wide, with one rod and one or two fixed shelves above. There’s no floor space to stand inside — you reach in from the doorway. It’s the default closet in apartments, condos, and most homes built after 1950.
This is different from a walk-in, where you step inside and can add free-standing furniture. It’s also different from a small closet that uses bi-fold doors — those are typically wider but share the same shallow depth constraint.
Why Reach-In Closets Are Harder
The 24-inch depth is the killer. Standard closet organizers and dressers are designed for 30-inch or deeper spaces, so they don’t fit. The single rod forces you to mix shirts, pants, and jackets on one level — you access everything at the same height, which creates visual chaos. There’s no floor space for a dresser or shelf unit inside the closet. The fixed shelf above the rod is usually only 12-16 inches deep — too shallow for bulky storage bins.
And most reach-in closets waste their most overlooked asset: the door. That flat surface is prime real estate for organizers.
The 4-Zone System
The 4-zone system splits the reach-in into distinct territories:
- Zone 1 (Hanging Rod): clothes only — shirts, pants, dresses, jackets
- Zone 2 (Fixed Shelves): folded items, handbags, and accessories
- Zone 3 (Floor): shoes, heavy items, storage drawers
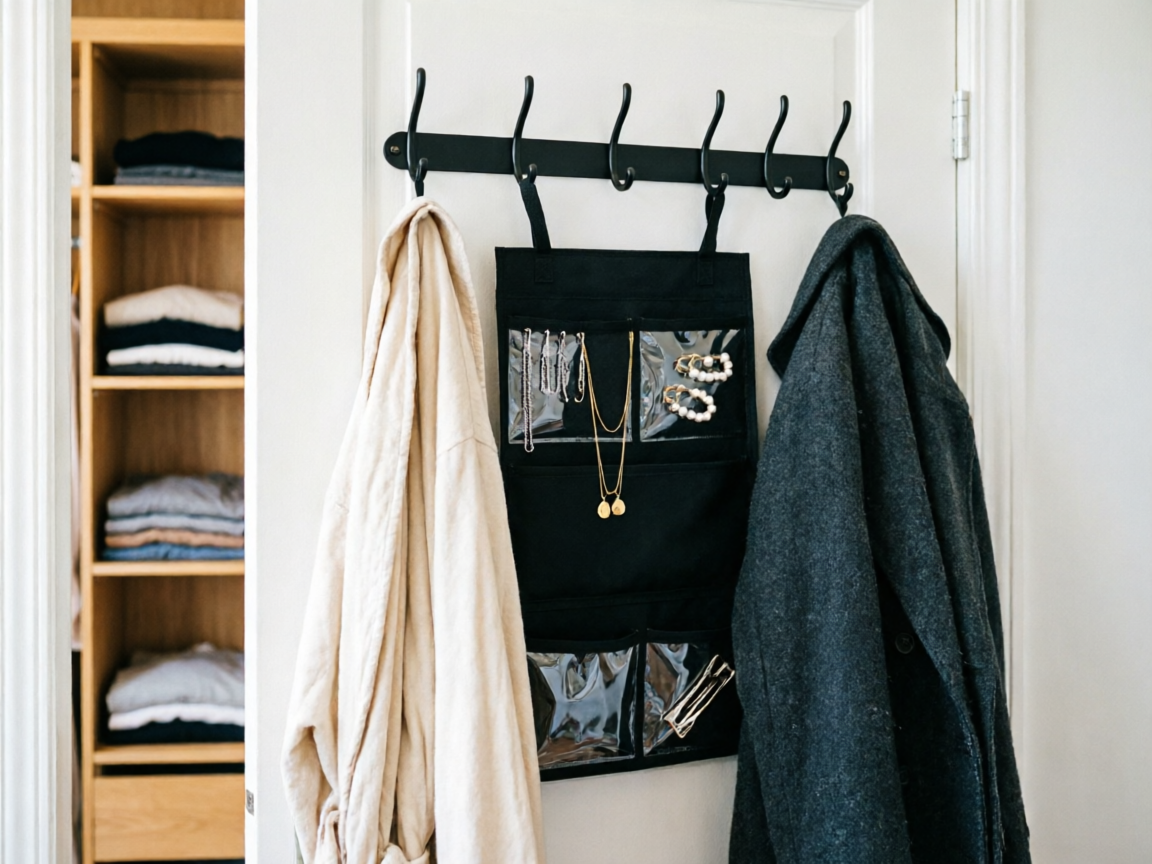
- Zone 4 (Door): outerwear, jewelry, bags, everyday accessories
Each zone uses a specific product type designed for shallow depth. It’s the same 4-zone framework I used in the small closet guide, adapted here for 24-inch reach-in depth.
What You’ll Need
These 8 products cover all 4 zones. Each is selected for reach-in compatibility — shallow depth, no-drill option, and compact form factor.
Zone 1 — Hanging Rod
Supforce Hanging Closet Rod Stainless Steel (2 Pack) — $29.99. This double rod converter splits your single rod into two levels. Adjustable height from 28 to 48 inches, stainless steel, load up to 88 lb total. No-drill installation uses tension poles. The highest-impact upgrade for any reach-in closet — it doubles hanging capacity in 5 minutes.
TOPIA HANGER 20-Hook 2-in-1 Belt Tie Hanger — $7.99. Hangs from the main rod and holds up to 30 belts and 30 ties. Frees drawer space in small closets. The rotating design makes items easy to access.
Zone 2 — Fixed Shelves
YOUDENOVA Hanging Closet Organizer 6-Shelf — $14.98. Creates 6 shelf tiers below the rod for folded sweaters, jeans, and shirts. Hangs from existing rod — no drilling. Each tier holds 5-8 folded items. The 12-inch depth fits standard reach-in dimensions.
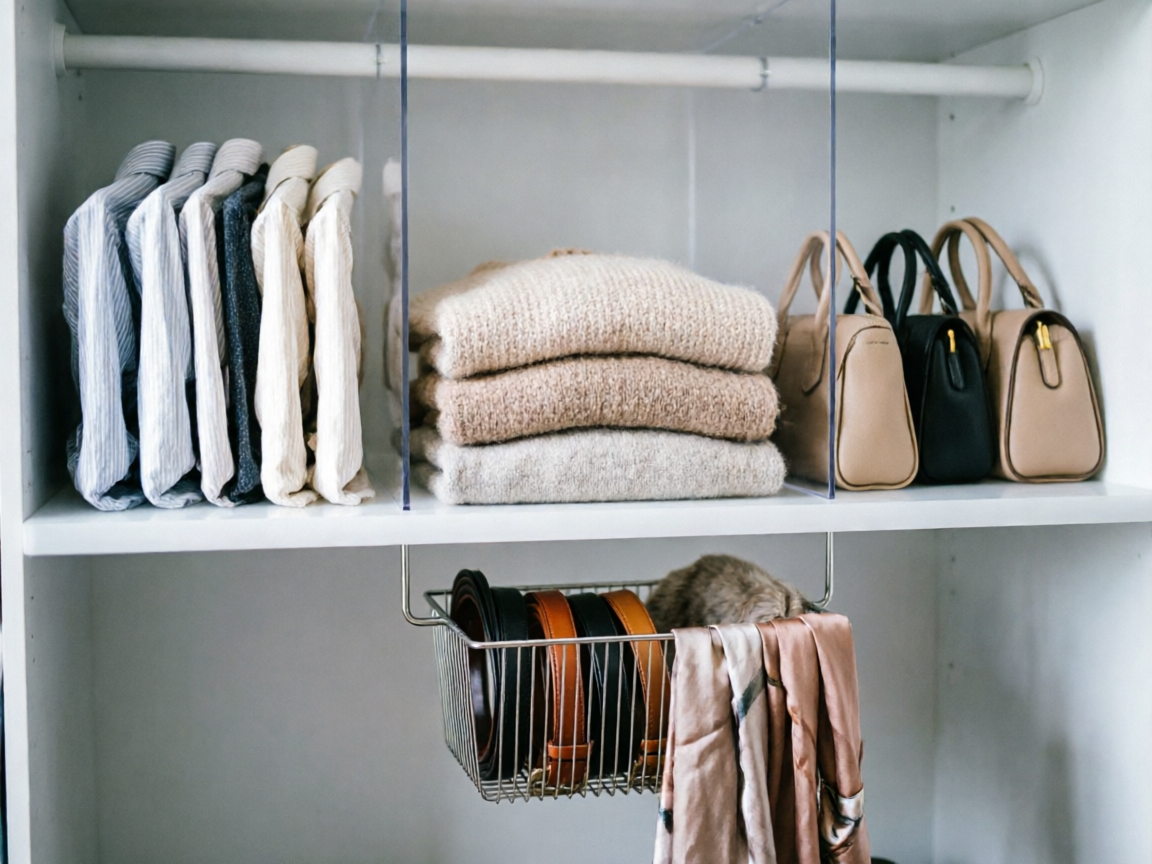
HBlife 6-Pack Clear Shelf Dividers — $21.99. Acrylic dividers separate shirt stacks, sweater piles, and handbag sections on the fixed shelf. They prevent the “lean and collapse” that creates shelf chaos. Fits standard 16-inch deep reach-in shelves.
ClosetMaid Wire Hanging Shelf Basket — $24.98. Slides onto your shelf to add storage below. Holds belts, scarves, wallets, and small accessories. Zero shelf footprint — uses only 5.5 inches of clearance.
Zone 3 — Floor
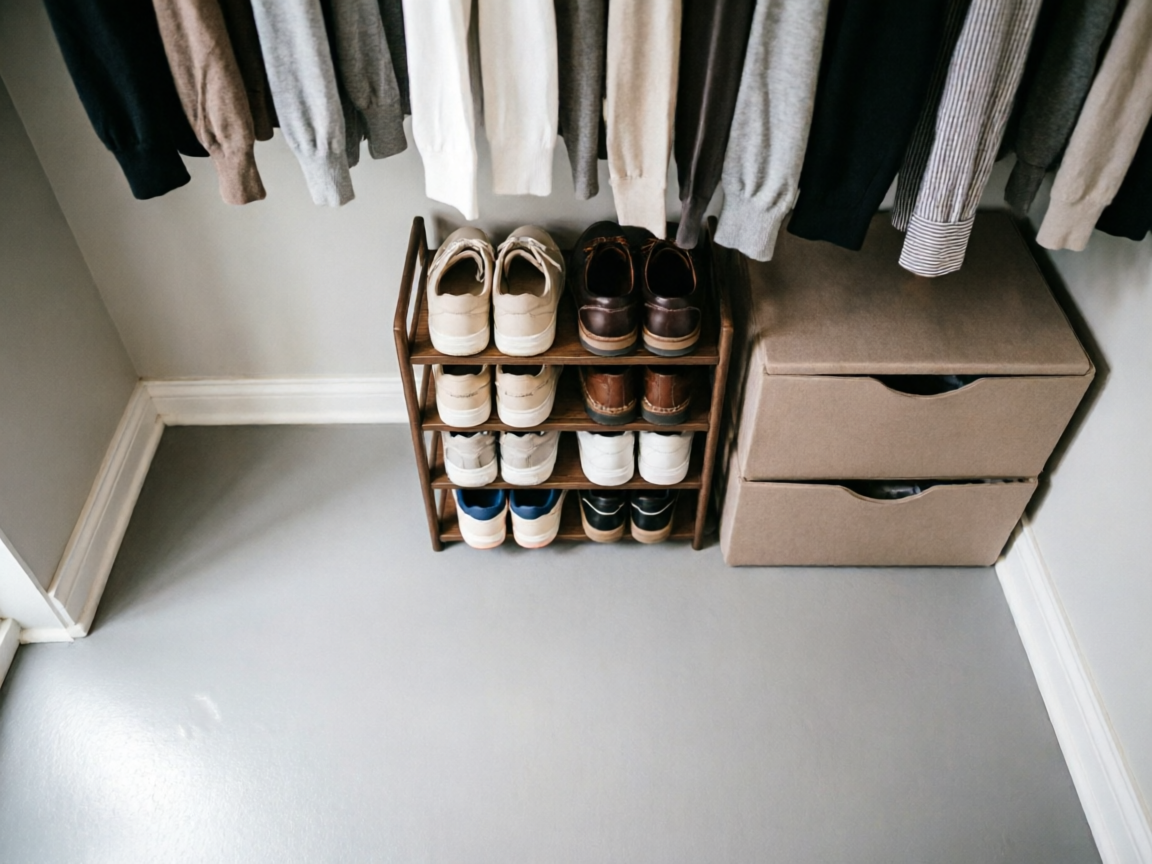
Autonomier 4-Tier Extra Small Shoe Rack (16.3” Wide) — $7.99. Only 16.3 inches wide — fits in the gap below shorter hanging items. Holds 12-16 pairs of shoes in 4 tiers. Stackable design. Best for single-door reach-in closets where every floor inch counts.
Homsorout Stackable Storage Drawers - 2 Tier Closet Organizer — $29.99. 2-tier fabric drawers with metal handles. Fits under hanging clothes on the closet floor. Holds folded items, workout gear, pajamas, and undershirts. Collapsible when not needed. Each tier measures 14 by 13 inches — fits standard reach-in floor depth.
Zone 4 — Door
FYY Over the Door Hooks 2-Pack — $9.99. Double-hanger design, fits standard 1 3/8-inch doors. Holds robes, jackets, bags, and outerwear. Each hook holds 15 lb. Rubber pads prevent scratches. The cheapest and fastest way to add storage to any reach-in closet.
BAGSMART Hanging Jewelry Organizer Roll with Hanger — $16.99. Double-sided with metal hooks. 48 pockets plus 21 hooks for earrings, necklaces, rings, bracelets. Hangs from any hook or rod on the door. Frees dresser-top space — perfect for reach-in closets where jewelry boxes don’t fit.
The 5-Step Method
Step 1: Empty and Sort
Pull everything out of the closet. Sort onto your bed into 5 piles: (1) Keep — Daily, (2) Keep — Seasonal, (3) Donate, (4) Trash, (5) Belongs elsewhere.
Now measure the empty closet. Depth (should be 24 inches — but measure), width (single vs double door), and height (from rod to shelf, shelf to ceiling). This reveals whether a standard rod converter fits.
Key constraint: standard reach-in depth is 24 inches, but some closets are only 22-23 due to wall texture or baseboard. Measure at 3 points and use the smallest.
This is also a good time to apply the declutter fast method to the “Belongs elsewhere” pile.
Step 2: Install the Double Rod
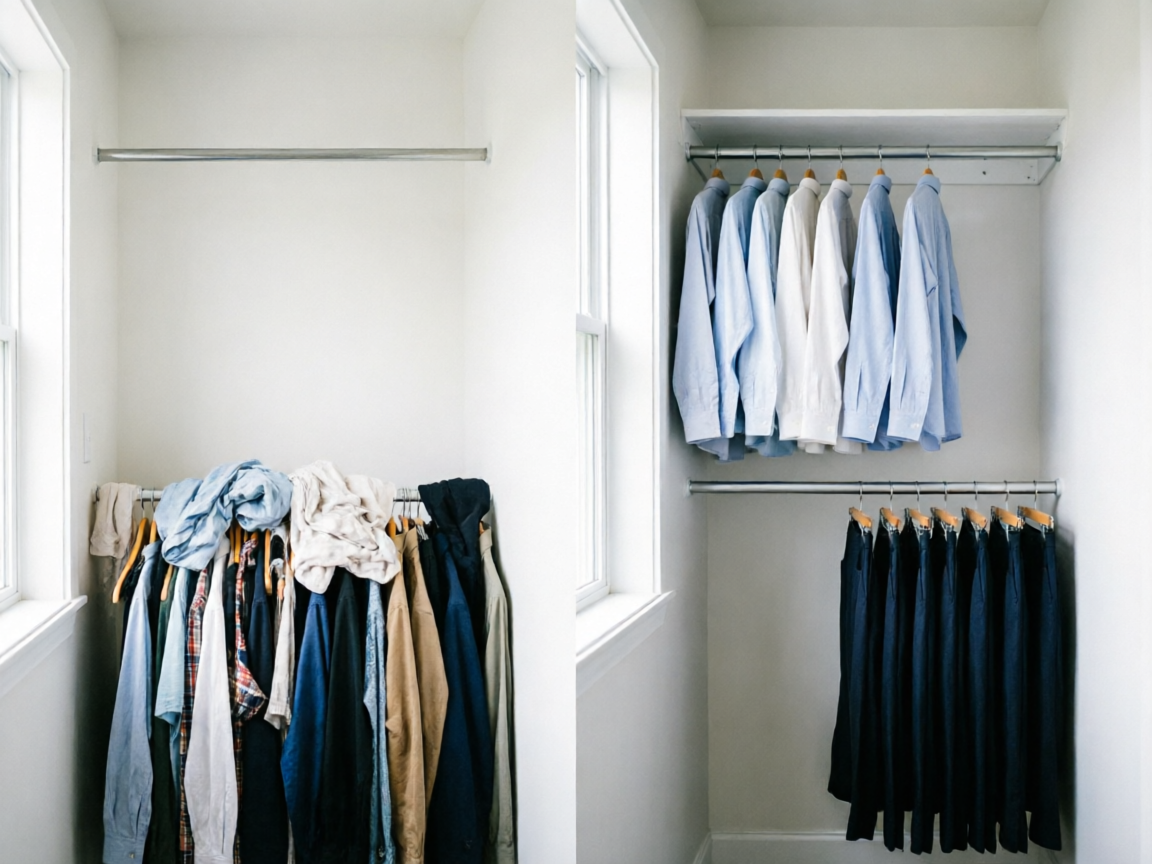
This single upgrade doubles your hanging capacity. Remove the existing single rod from its brackets — usually just lift it up and out. Install the Supforce double rod — no drilling required because it uses vertical tension poles.
Set the upper rod for shirts at eye level (~60 inches). Set the lower rod for pants and skirts (~36 inches). Leave 12-18 inches above for the fixed shelf zone.
Pro tip: If your closet already has a fixed shelf above the rod, skip the upper rod and use the shelf for folded shirts. Put the lower rod alone for pants.
Step 3: Zone the Hanging Space
On the upper rod (or shelf): shirts facing left, all sleeves pointing the same direction. On the lower rod: pants folded over velvet hangers — they grip better than plastic. Group by type, then by color within each type.
Use the TOPIA HANGER belt and tie hanger on the rod between shirt groups to create visual segments. The 4-zone system rule for Zone 1 is simple: clothes only. No sweaters on the rod (the hanger shoulders stretch them). Use the YOUDENOVA hanging shelf for sweaters.
Velvet hangers save 1-2 inches per shirt — standard plastic hangers waste about a quarter inch each. Fifty shirts on plastic hangers equals 12.5 wasted inches of rod space — an entire rod section.
Step 4: Organize the Fixed Shelves
The shelf above the rod is the most underused space in a reach-in closet. Install HBlife shelf dividers to separate categories: shirts on the left, sweaters in the middle, handbags on the right. Stack items vertically using the KonMari fold — not horizontally. You can fit 15-20 folded shirts in a 2-foot section.
Add the ClosetMaid under-shelf basket below the shelf for belts, scarves, and wallets. It slides under — zero shelf footprint.
The 3-stack rule: never stack more than 3 items high on a reach-in shelf. The shelf is only 16 inches deep. Stacks taller than 3 fall forward every time you open the door.
For more on vertical folding techniques, see the KonMari method guide.
Step 5: Optimize Floor and Door
Floor: Place the Autonomier narrow shoe rack below the shortest hanging section — usually dresses or jackets at one end, since they hang higher than shirts. Shoes go one pair per slot, heels visible so you can grab them.
Door: FYY over-door hooks for your robe, jacket, and bag. The BAGSMART jewelry organizer hangs on one of the hooks for daily accessories.
The 80/20 rule: 80 percent of daily grabs come from Zones 1 and 4 — the rod and door. Seasonal items go to Zones 2 and 3 — the shelf and floor. If you’re grabbing something from the floor more than once a week, it’s in the wrong zone.
For deeper closet systems, the walk-in closet guide covers larger spaces, and under-bed storage handles overflow items.
Layout by Reach-In Size
Single Door (24-30 Inches Wide)
The narrowest reach-in. The double rod creates 2 hanging rows. Shelf dividers split the 1-2 shelf sections. The narrow shoe rack fits below the shortest hanging items. Over-door hooks and jewelry organizer go on the door.
Layout: shirts on the upper rod (12-15), pants on the lower rod (10-12), sweaters on hanging shelf tiers (6-8 folded), shoes on the narrow rack (8-12 pairs), accessories on the door.
Double Door (30-48 Inches Wide)
Standard reach-in with a double door that opens in the middle. Two rod sections: left and right. Upper shelf spans 3-4 sections. Use one double rod per section.
Layout: left side shirts on upper rod + pants on lower rod. Right side: dresses and jackets on upper rod, stackable drawers on the floor. Two over-door hooks — one on each door.
Bi-Fold (48-72 Inches Wide)
The widest reach-in. Bi-fold doors fold in the center, giving a 48-72 inch opening. Three to four rod sections with center support. Closest a reach-in gets to walk-in capacity.
Layout: 2-3 rod sections for hanging, 1 section for hanging shelf organizer. Stackable drawers on the floor. Bi-fold doors can hold 2-3 slim over-door hooks.
Common Mistakes to Avoid
- Putting shoes on the fixed shelf — shoes on the shelf waste prime folding space and collect dust. They belong on the floor or a narrow shoe rack. The shelf is for folded items and bags only.
- Using thick plastic hangers — standard plastic hangers waste 1-4 inches of rod space per shirt compared to velvet hangers. In a 30-inch reach-in, that’s the difference between 15 shirts and 22 shirts.
- Forgetting the door — the back of the door is free real estate. Over-door hooks add 20-30 percent more storage to any reach-in closet.
- Buying organizers before decluttering — bins and dividers before removing what you don’t need means organizing clutter. Always empty and sort first, then measure, then buy.
- Skipping maintenance — a reach-in closet degrades faster because there’s no space to absorb drift. Set a 5-minute weekly reset: fold fallen stacks, return items, check the donate pile.
Constraint Guide
- if you rent → use no-drill products only. Tension rod doublers, over-door hooks, and hanging shelf organizers. Skip wall-mounted brackets and permanent shelves. When you move, everything comes down with zero damage.
- if you have a single door → focus on the door zone (Zone 4). Use a jewelry organizer, an over-door hook for outerwear, and consider a door-mounted shoe rack.
- if you have bi-fold doors → skip over-door hooks on folding panels (they may not close properly). Use floor and shelf zones more aggressively.
- if you share the closet → assign zones per person. One gets the left rod and shelf, the other gets the right. Don’t mix — it always devolves into one person’s items taking over.
- if you’re organizing on a budget → start with zone 1 (the rod converter, under $30). Then add the door zone (hooks under $10). You’ll get 70 percent of the benefit from these two zones alone.
For more on closet organization, start with the closet organization hub, then see the small closet guide, walk-in closet system, and shoe storage solutions. To prep before organizing, try declutter fast and learn how to choose storage bins and label closet zones.