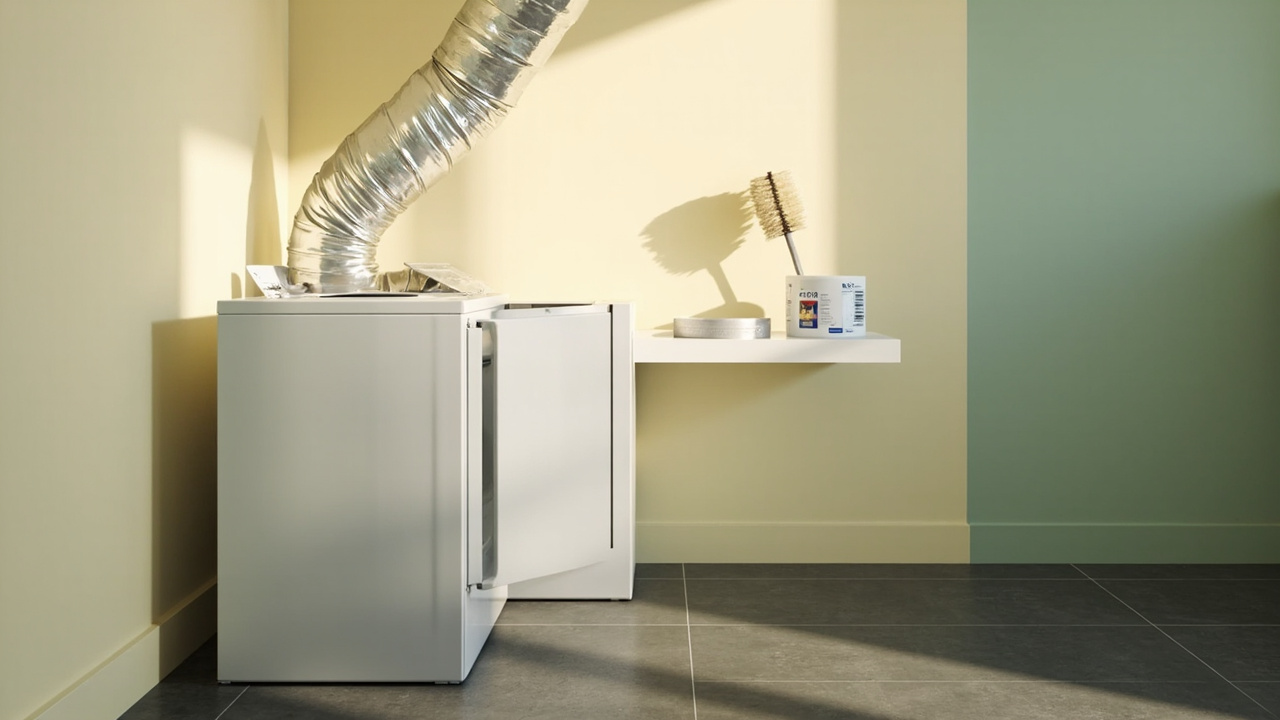
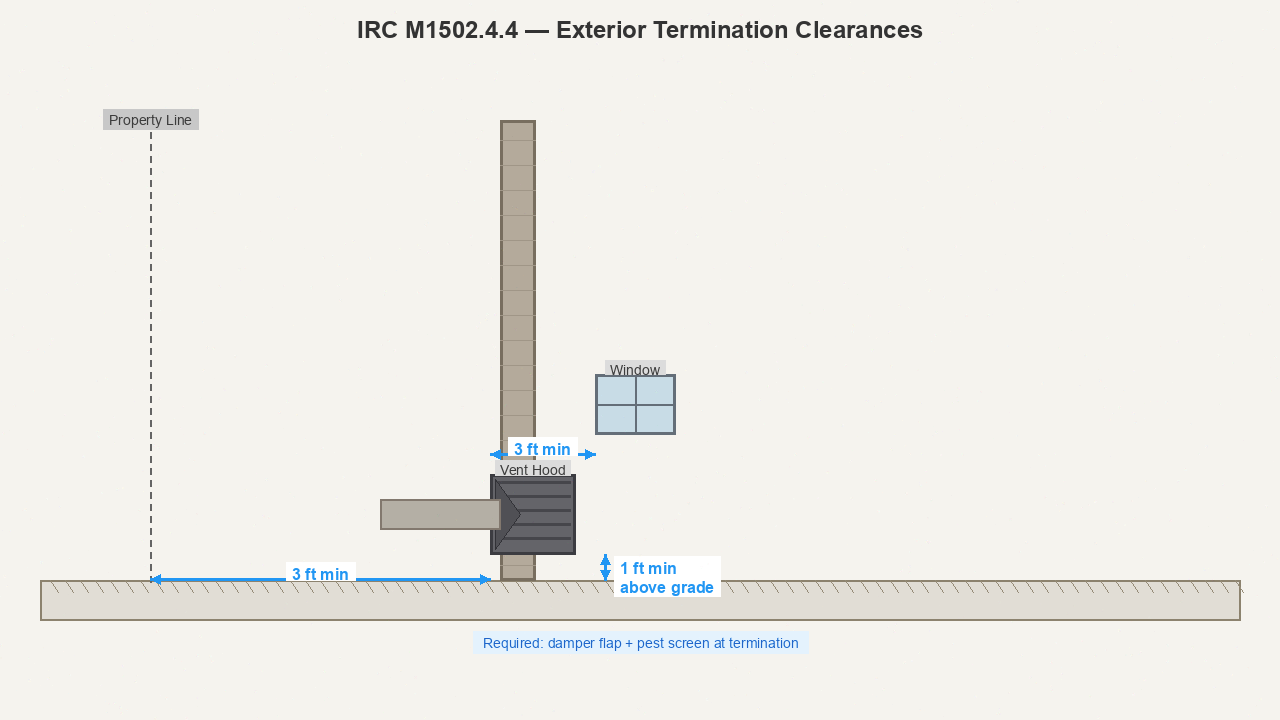
A safe dryer zone needs three systems working together: code-compliant vent clearance (IRC M1502 — 3 ft from property lines, 1 ft above grade), rigid or semi-rigid metal ducting (never flexible plastic), and a quarterly lint-removal routine covering the screen, trap housing, and full duct run. The 7 products below cover each layer — pick by zone type, not by brand.
For the full laundry system context, see the Laundry Room Hub. New to the site? Start with our Declutter 101 overview.
Why the Dryer Zone Causes 2,900 Fires a Year
The NFPA recorded 2,900 home clothes dryer fires annually from 2010 to 2014, causing $238 million in property damage, 5 deaths, and 100 injuries (source: nfpa.org). Failure to clean is the leading ignition factor at 34 percent, ahead of electrical, mechanical, and ambient-heat causes combined.
Dryer-zone fires start in three locations: the lint trap housing (about 40 percent), flexible duct kinks (about 35 percent), and exterior termination blockage (about 25 percent). The “dryer zone” isn’t just the appliance — it’s the 6-foot radius including the wall cavity, floor, and termination.
This guide covers all three ignition zones with code-compliant setup and a 7-product safety kit. In our experience, most dryer fires are preventable with the right materials and a consistent cleaning rhythm. For the broader 5-zone laundry layout, each zone gets its own setup checklist.
Lint Fire Risk: Where Lint Hides
The Screen (every load)
The lint screen catches roughly 80 percent of particulate. Empty it before every load. A clogged screen extends dry time by 75 percent and raises exhaust temperature 30 degrees — both fire-risk multipliers.
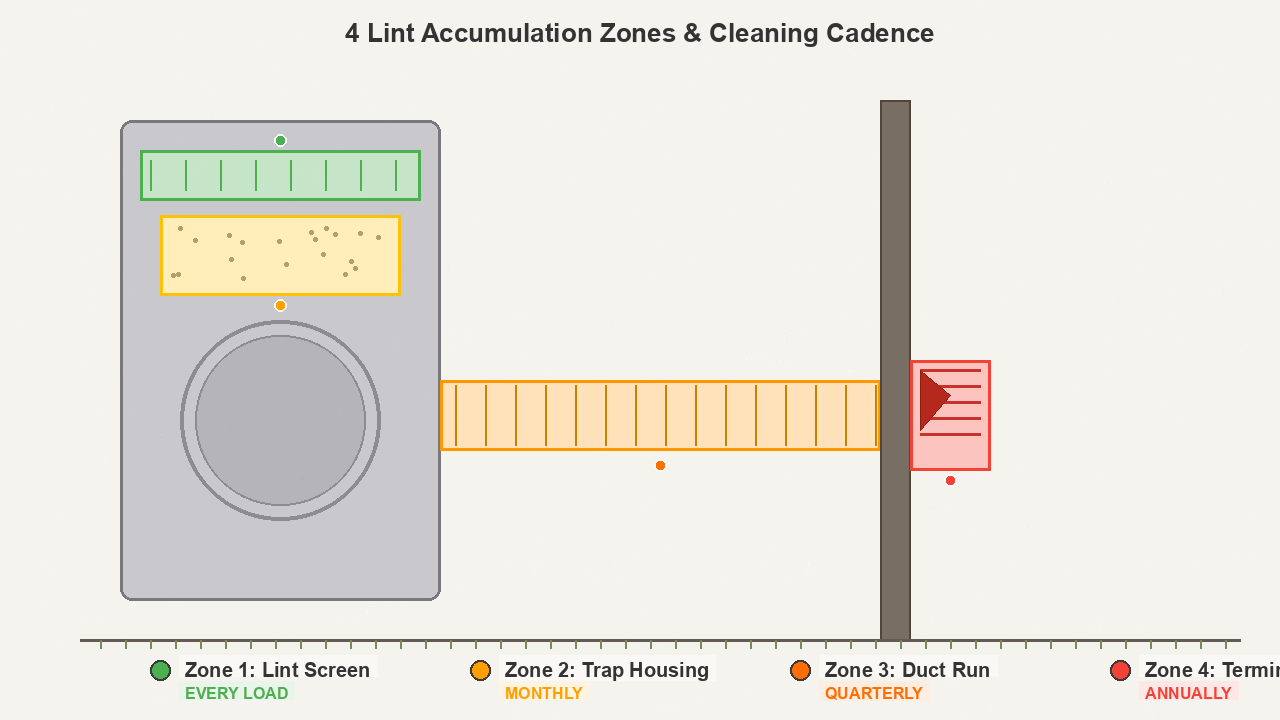
The Trap Housing (monthly)
Lint bypasses the screen and accumulates in the cavity where the screen slides in. Use a long-handled brush like the Holikme 3-piece lint brush set to reach past the screen into the housing.
The Duct Run (quarterly)
The 4-inch duct from dryer to wall accumulates the most dangerous lint — the kind that ignites. Use a drill-attached flexible rod kit like the Sealegend 35-foot dryer vent cleaner kit — our top pick for quarterly duct maintenance.
The Termination (annually)
The exterior hood gets clogged with nest debris, snow, and backdrafted lint. Inspect from outside each spring and fall.
Rigid vs Flexible Ducting: The Code Decision
IRC M1502.2 bans flexible plastic ducts entirely. The choice between semi-rigid aluminum and rigid sheet metal comes down to installation geometry.
Semi-Rigid Aluminum (recommended for most homes)
The Eastman ArmorFlex 8-foot semi-rigid duct is rated Fire Class 0 and bends 90 degrees without kinking. Use it when the dryer sits within 8 feet of the wall exit. Seal joints with HVAC foil tape — never cloth duct tape. The Romeda HVAC-grade foil tape is rated for 120 C continuous.
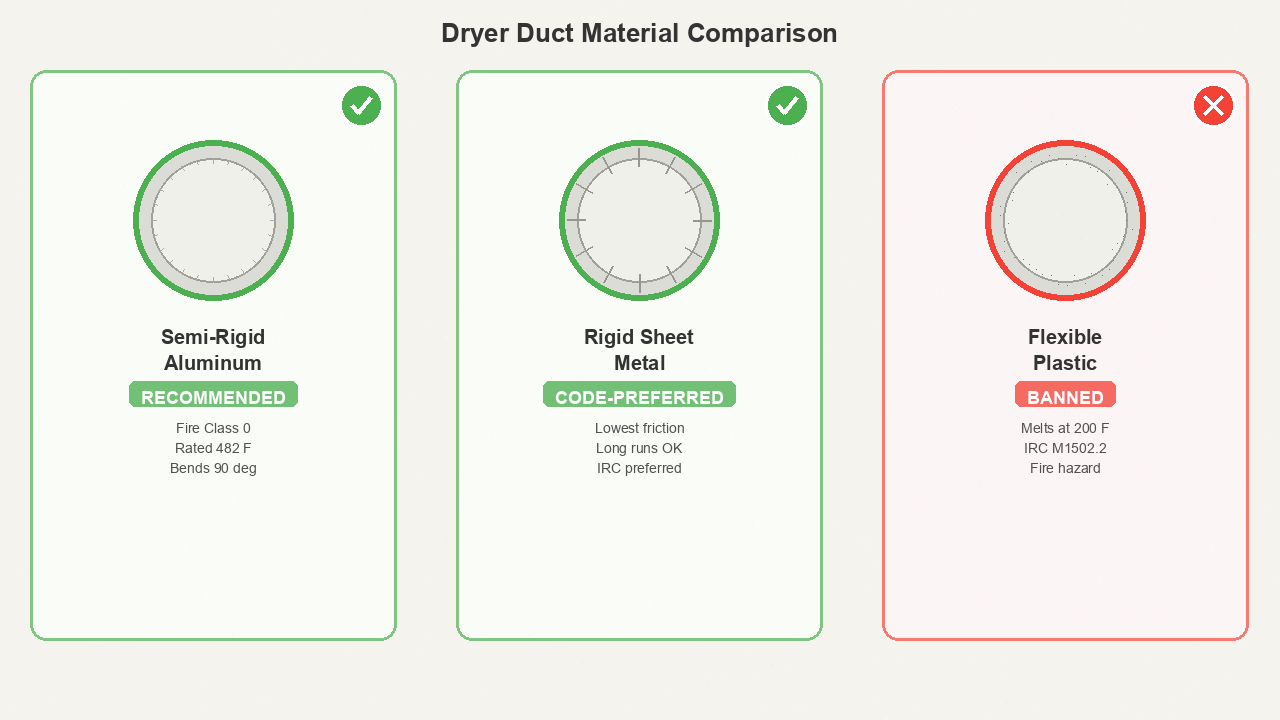
Rigid Sheet Metal (code-preferred for long runs)
Required when total duct length exceeds 8 feet or has multiple bends. IRC M1502 subtracts 2.5 ft per 45-degree bend and 5 ft per 90-degree bend — max 25 ft total.
Never Use These Materials
Flexible plastic (white vinyl) melts at 200 F and is a code violation. Flexible foil (shiny aluminum-look) is legal but high-friction and sag-prone. PVC pipe builds static charge that ignites lint. Before buying anything else, we recommend checking your existing duct material — if you find white vinyl behind your dryer, replacing it is the first move. In our experience, too many homes need nothing more than a duct swap to fix the fire risk.
Lint Trap Install and Maintenance Schedule
Built-in Lint Screen (every dryer)
Clean before every load. Replace the screen if bent, torn, or sliding loosely — a warped screen leaks 20 percent more lint into the housing.
Secondary Lint Trap (indoor venting only)
For apartments with no exterior wall access, an indoor vent kit like the Dundas Jafine TDIDVKZW uses a water reservoir to capture lint. It’s not code-compliant for permanent installations — only a last-resort or temporary fix.
Monthly Deep Clean Steps
- Unplug the dryer
- Remove the screen and vacuum the housing with a crevice tool
- Brush the housing walls with the Holikme lint brush
- Wipe the interior with damp microfiber
Quarterly Full Duct Clean Steps
- Pull the dryer away from the wall
- Disconnect the duct at the dryer and wall
- Run the Sealegend drill-kit from both ends
- Reassemble with new foil tape joints
Quarterly Cleaning Routine: 4 Steps
The cleaning cadence has four layers, each addressing a different lint zone.
The 4-Cadence Timeline
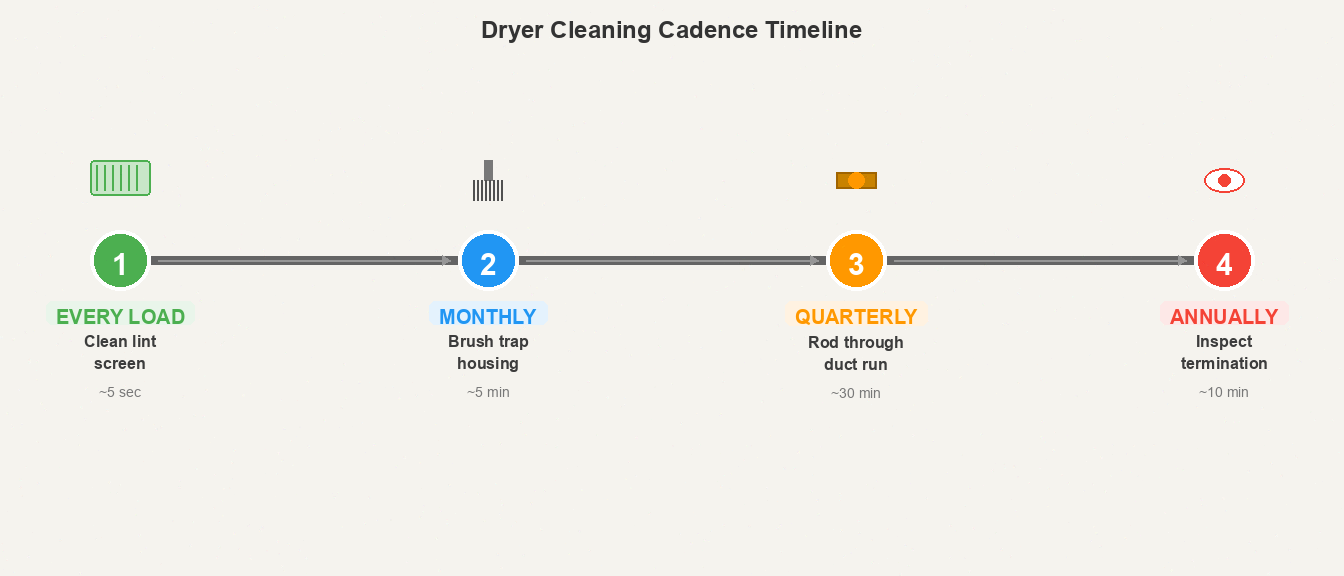
- Screen: hand-clear before every load (about 5 seconds)
- Housing: brush and vacuum monthly (about 5 minutes)
- Duct: drill-attached rod quarterly (about 30 minutes)
- Termination: visual and manual clear annually (about 10 minutes)
If you dry more than 7 loads per week, double the cadence — housing biweekly, duct monthly. This mirrors the Zone Cleaning Method approach: each zone gets its own rhythm. For a faster reset before diving into dryer maintenance, the Declutter Fast method pairs well with quarterly cadences.
IRC M1502 Code Compliance Checklist
IRC (International Residential Code) Section M1502 governs dryer exhaust in residential construction. Here’s what each subsection requires.
M1502.2 — Duct Material
Flexible plastic is banned interior. Listed flexible aluminum is allowed only behind the dryer (8 ft or less).
M1502.3 — Duct Size
Minimum 4-inch interior diameter. Smaller ducts produce higher velocity but more lint friction.
M1502.4.4 — Termination Clearances
The exterior termination must be 3 ft from the property line, 3 ft from operable openings (windows, doors), and 1 ft above grade. A damper is required. The Funmit 4-inch vent hood includes a built-in louvered damper and pest screen.
M1502.5 — Makeup Air
Required when dryer capacity exceeds 200 CFM — typically large-capacity units in tight rooms.
Layout by Dryer Zone Type
Different home layouts demand different dryer-zone strategies. Pick yours below.
Wall-Vented Standalone Dryer
Best case: short rigid duct run (8 ft or less), exterior wall termination. You’ll need the Sealegend kit, ArmorFlex duct, and Funmit vent hood — about $53 total. No indoor trap needed.
Apartment with No Exterior Wall
Use the Dundas Jafine indoor vent kit as a last resort. Pair it with the Holikme lint brush for monthly housing cleans. Plan to upgrade if your lease allows.
Garage-Adjacent or Long-Run Dryer
Rigid sheet metal duct is required for runs over 8 ft or multiple bends. IRC M1502 length deductions apply. Add quarterly drill-rod cleaning with the Sealegend kit.
Constraint Guide
If rental (no wall modifications)
Use semi-rigid aluminum duct like Eastman ArmorFlex plus Romeda foil tape for joints. Skip the exterior vent hood replacement unless your landlord approves. The indoor vent kit is reversible — install it without permanent wall changes.
If tight space (closet dryer)
Use periscope-style rigid duct for a 3-inch clearance instead of 8 inches for flexible. The ArmorFlex bends 90 degrees without kinking for tight turns. Add the Funmit vent hood if the existing termination lacks a damper.
If long run (over 15 ft duct)
Upgrade to rigid sheet metal. Subtract 5 ft per 90-degree bend per IRC M1502. Seal every joint with Romeda foil tape and clean quarterly with the Sealegend drill-kit. Consider a booster fan if you’re past 25 ft — consult an HVAC pro.
If garage installation
Use an insulated duct and exterior wall cap with backdraft damper. Garage temperature swings cause condensation, so slope the duct 1/4-inch per foot toward the exterior. The Funmit vent hood with pest screen handles this, sealed with Romeda foil tape at the wall penetration.
If budget (under $50 total)
The Sealegend drill-kit ($28) plus the Holikme lint brush ($8) plus Romeda foil tape ($7) covers the three core needs for $43. Skip the duct replacement, vent hood, and lint roller until you’ve confirmed your existing setup is sound.
Common Mistakes
Mistake 1 — Using Flexible Plastic Duct
The leading fire-code violation. White vinyl ducts melt at 200 F — exhaust reaches 135-160 F normally, but blocked runs spike past 300 F. Replace immediately with Eastman ArmorFlex.
Mistake 2 — Sealing with Cloth Duct Tape
Cloth “duct tape” dries out at dryer exhaust temperatures (140 F and up), peels off, and leaks lint into the wall cavity. The fix: use HVAC foil tape rated for 120 C like Romeda — our go-to for sealed joints.
Mistake 3 — Ignoring the Trap Housing
Most owners clean the screen (visible) but skip the housing (invisible). Lint accumulates a quarter-inch per year in the housing, eventually contacting the heating element. We see this overlooked in almost every home we check.
Mistake 4 — Pushing the Dryer Too Close to Wall
Crushes flexible duct, creating a kink that captures lint. Maintain minimum 4-inch clearance from the wall. Use periscope duct for tighter spaces.
Mistake 5 — Forgetting the Exterior Termination
Birds nest in vent hoods, snow blocks the flap, and lint builds at the damper. Annual exterior inspection is mandatory. Replace a broken hood with the Funmit vent cover.
When to Call a Pro
Call an HVAC technician or chimney sweep if your duct run exceeds 25 ft after IRC deductions, passes through finished walls that can’t be inspected, has more than three 90-degree bends, or you smell burning during operation. Pro cleaning costs $130 to $250 for a full rotary brush and commercial vacuum service. We’ve found this is worth it if you haven’t cleaned the duct in over two years, or when your dryer takes multiple cycles to dry a single load.
What to Buy Only If Needed
Indoor Vent Kit (apartments only)
The Dundas Jafine indoor kit ($18.18) is only for setups with no exterior wall access. Not code-compliant for permanent installations.
Pre-Dryer Lint Roller (pet households)
The beitophome lint roller ($9.69) reduces trap load by about 30 percent if you have pets that shed. Optional, not required for safe operation.
Vent Hood Replacement (only if existing is broken)
The Funmit vent hood ($9.99) is only needed if your existing termination is missing a damper, has broken louvers, or lacks a pest screen.
Related
- Laundry Room Layout: 5-Zone Design Blueprint — the dryer zone is 1 of 5 zones in a complete laundry layout
- How to Declutter a Laundry Room — Stage 3 (Dry) overlaps with lint bin setup
- Small Laundry Room Organization — tight-space clearance constraints
- Laundry Supplies Organization — detergent and chemical safety near dryer heat
- Laundry Sorting Systems — multi-bin hampers that sit in the dryer zone
- Zone Cleaning Method — the quarterly cadence fits this methodology
Key Takeaways
- NFPA: 2,900 dryer fires per year — failure to clean is 34 percent of the cause
- IRC M1502 bans flexible plastic ducts; semi-rigid aluminum is the residential standard
- Three lint zones need different cadences: screen (every load), housing (monthly), duct (quarterly)
- Exterior termination must be 3 ft from the property line plus 1 ft above grade with a damper
- Indoor vent kits are not code-compliant for permanent installations
- Never use cloth duct tape — use HVAC foil tape rated 120 C or higher
- Drill-attached rod kits reach 35 ft through ducting — the only way to clear deep wall runs